Beginners guide to Beer Photography With Your Phone
April 7, 2020
_ _
...Savour the next beer with a hobby
Regardless, the only rule so to speak of is make sure you glass is clean.
Any impurities in the glass will cause bubbles to stick to it. It has been said that sparkling wine will not have any bubbles in a sterile glass.
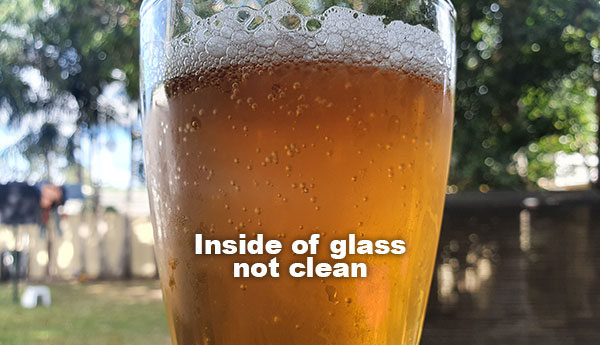
When you wash your glass, it is important to thoroughly clean the inside. Something like this works well and is good for delicate and sturdy glasses alike.
So a few years ago, the legends at The Glassware Company (Warana Queensland) hooked us up with some top shelf branded glasses. This is some next level accessory, but IMO well worth it if you have a brand to promote.

With a bit of playing around and following a few basic photography principals you can improve your shot very easily.
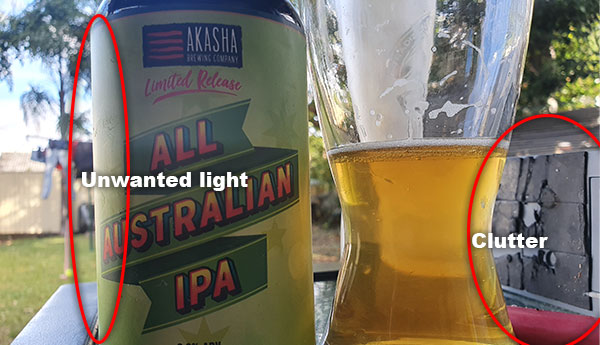
This is far from perfect, however illustrates the point.
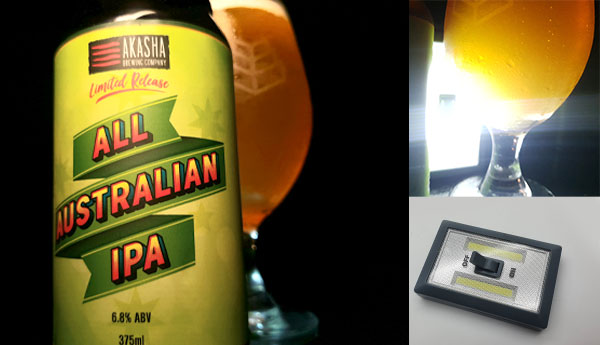
In this there was the addition of a $5 light behind the glass to give the beer in the glass some definition.
This is a bit better… because it was the first or second beer – rather than one 'later on'..

Benefit of having a portable, battery powered light means you can move it around freely – and quickly. In addition, on some models you can adjust the kelvin (light colour) to suite.
Try and prevent too much light (especially from the sun) from behind the glass / can. It will lose the definition of the can. In by saying this, if it is a light coloured can, it can work to your favour
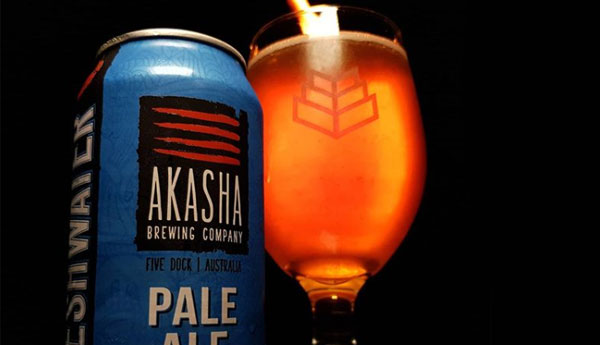
The flip side to this is when it gets darker.. most of the time I have a secondary (synthetic or natural – ie one of these) . Place one of these behind the glass and you can get some really interesting effects.










Soo I am far from an expert in taking good beer photos – but I enjoy it immensely.
Over the years I have analysed many photos and done a little research.
If you are a beginner in the game and interested in taking better shots, hopefully this helps.
Glass:
Right type of glass for the beer? – There is much info out there about this one. I won’t bother going into it. IMO, there are people enjoying beer out of a shoe through to the OG connoisseurs.Regardless, the only rule so to speak of is make sure you glass is clean.
Any impurities in the glass will cause bubbles to stick to it. It has been said that sparkling wine will not have any bubbles in a sterile glass.

When you wash your glass, it is important to thoroughly clean the inside. Something like this works well and is good for delicate and sturdy glasses alike.

So a few years ago, the legends at The Glassware Company (Warana Queensland) hooked us up with some top shelf branded glasses. This is some next level accessory, but IMO well worth it if you have a brand to promote.

Setting up the shot:
How long is a piece of string… You can add associated ingredients, climb a mountain to get the perfect backdrop, play with muslins and lights – all of which are a lot of fun, but sometimes you just want to drink the bloody beer…With a bit of playing around and following a few basic photography principals you can improve your shot very easily.
- Declutter – if you have a bunch of crap next to your beer or in the background, simply move a few of the items in shot, or move to take at a different angle.
- Clean surface – the table / bench etc may be in the shot, so take a few seconds to wipe it with a damp cloth
- How to frame – should the beer / beer and glass go in the middle or right or left. Google ‘Rule of thirds’ This is not always the way to go about things,especially for Instagram (with generally a 1:1 aspect ratio) however will give you a start.


This is far from perfect, however illustrates the point.
In this there was the addition of a $5 light behind the glass to give the beer in the glass some definition.
This is a bit better… because it was the first or second beer – rather than one 'later on'..

Lighting and angle:
IMO, this is the most important. I use one of these
Benefit of having a portable, battery powered light means you can move it around freely – and quickly. In addition, on some models you can adjust the kelvin (light colour) to suite.
Try and prevent too much light (especially from the sun) from behind the glass / can. It will lose the definition of the can. In by saying this, if it is a light coloured can, it can work to your favour
The flip side to this is when it gets darker.. most of the time I have a secondary (synthetic or natural – ie one of these) . Place one of these behind the glass and you can get some really interesting effects.

Camera settings:
This will vary a lot depending on your phone. Pretty much any recent new phone can take great shots if you play around with them enough. Manual mode can be daunting, however its how you get the most control. Personally, I go usually with a lower ISO and shutter speed then add manually move a light to give the desired highlights – then bump up the shutter speed accordingly.Head:
If you have setup your shot, pored your beer then the head is gone by the time it has taken you to take your shot, you can use a thin stick of wood (wooden skewer / branch twig ) Careful with this one, give it too much of a stir and it will react!

Summary:
I love good beer – and especially like to pay homage to local indie beer to support money spent on beer – is then re-spent in our communities. If you want to checkout how some of the pros do it, check these Aussie legends:


